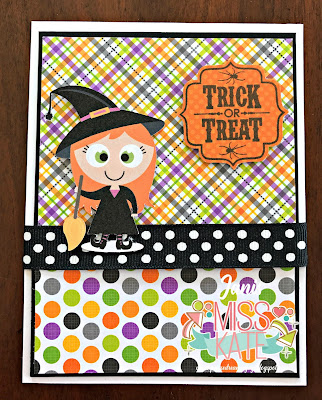
Hi! This is Jenny Fruchey from Jen's Crafty Place as your Guest Designer today! I can't wait to share my Halloween card with all of you!
 Now let's make the card!
Gather your supplies:
Purple cardstock base 8.5 x 11 inch
Black cardstock : 8.25x 5.25 and 4.25 x 5.25 inch
Purple pattern paper: 8.125 x 5.125 inch
Orange pattern paper: 4 x 5 inch
Scrap white cardstock for Sentiment
Black in Memento for Sentiment
Miss Kate's Witch in Cauldron cut from cutting machine finished size: 5.25 inch
(Scrap paper: two shades of green, two shades of orange, 2 shades grey, black, 3 shades of purple)
Rubber stamp with Halloween saying: Toil & Trouble from tailored expressions used now retired
Layered dies to cut saying: Sizzix Labels Fancy #4 the
Crafter's Companion Clear Sparkle Pen
Faux Enamel Dots: Made by Me
Foam Squares
Make your Witch in Cauldron from your Miss Kate Cuttables file. Use scrap papers to cut each layer and assemble with clear glue. Make the die cut fit the card you have decided to make. If making the size I did, assemble her to 5.25 inch total size. Add some sparkle pen to the bubbles and all parts of the insides of the cauldron. I do like sparkle so I added some to the bows on her shoes too! Next, fold your 8.5 x 11 inch piece of purple cardstock in half for the card base and set aside. Stamp your sentiment on white cardstock and cut with your favorite shape die. I used Sizzix Labels Fancy #4. Cut out a shadow layer, I used black with the same die set. Cut your black mats, purple pattern paper and orange pattern paper to the sizes above. Adhere with tape or glue on the purple card base. Add the die cut and the sentiment with foam squares, add faux enamel dots and you are done! Happy Crafting and Happy Halloween!! Be sure to drop by my blog and please subscribe for more fun ideas: http://jenscraftyplace.blogspot.com/
BONUS CARD!!
I had so much trouble deciding what design to use, I decided to make 2 cards!! Hop on over to my blog: Jen's Crafty Place to learn how to do this cute shaker card step by step.
I used the Halloween Witch Shoe Frame to make the shaker window. If you don't want to make a shaker, this die cut is wonderful on it's own. Just cut it out and mount over solid paper and add to a card front with some decorative paper and you are all set!
Another Idea:
I decided to play a bit more and added the shaker to a 5.5 x 8.5 inch card. I added some black paper for the base, a purple embossed piece for the second layer and some die cuts from Miss Kate Cuttables (Spiderweb Set) and added some Wink of Stella to the web. I used the card for my shaker element and added a few little pieces from the shaker for some color. For fun I added a spider with google eyes!
Hope you enjoyed all the ideas and die cuts from Miss Kate Cuttables! Happy Crafting! Jen from Jen's Crafty Place


