Monday, February 29, 2016

February 2016 Fan Projects


Hi Everyone! It's time to share the February Fan Projects. 
These projects all feature Miss Kate Cuttable files and were created by the awesome fans. 
Crafters who supplied links to their blogs have their names highlighted below.
Just click on the link to check out more of their projects.


Scrapbook Layout by Corrina Colquhoun

Scrapbook Layout by Karen Karczewski

Valentine by Ginger Ropp

Valentine Card by Debby Pannell

Valentine Shaker Card by Ashley Morgan

Valentines by Jennifer Little

Valentine Card by Angela Corcoran

Valentines by Jennie Hilligus

Card by Kim Marie

Card by Leyna Sue

Valentine by Therese Aragona

Cards by Diane Paulina


Card by Jen Collins

Easter Card by Lorie Ames

Easter Treat Bag Topper by Melissa Miranda

Nautical Theme Recipe by Marcia VanHoosan

TShirt by Tammy Bour

Baby Decor by Wanda Liz Homung

If you create a project with Miss Kate Cuttable's files please share on the Galleria Facebook Page and don't forget to join the monthly challenge.

Don't Facebook? Please email me your project at amysmccabe@comcast.net.

Hope these fan projects inspired you!

Friday, February 26, 2016

Snow Yeti!

This is Jenny Fruchey from Jen's Crafty Place
I am very honored to be the Miss Kate Cuttables Guest Designer for today! 
I don't know about you but anything 
Rudolph brings back such wonderful childhood memories for me. 
Since Christmas is over, I have a great winter card for you! Snow Yeti is that 
wonderful Abominable Snowman from Rudolph. It is a great addition to scrapbook pages or cards but I decided to make HIM my actual CARD. If you don't know how, just follow along!
 

1. Open the file in your favorite cutting software. I used my Silhouette Cameo and Make The Cut.

2. Select the WHOLE file and pull the bottom right handle to size the yeti to 5.25 inches.
3. Select the solid yeti. In the pic above it is the green image. Move all items off the cutting mat and move the green yeti on the mat. Select "copy" and "paste in place" then "flip". Without moving it, use your "up arrow" on your key board to move the new copy of your yeti up until just the top is overlapping with your original yeti.
4. Select the two yetis and use the "weld" key to weld both snowmen together to form the base of your card.

5. Cut the card base out with white card stock and cut all other pieces out in their respective colors. (One light blue, one grey and one white.) The Yeti file is color coordinated but if you need some reference use the jpg included in your file purchase. (You do not need to cut out the Christmas trees or the snowflakes for this project.) I grouped each item by color so you can cut them out at the same time. Either arrange each color group on a mat and cut or arrange each group on a section of the mat and cut all together.


6. Add some black paper behind the light blue face. (The holes for the mouth and eyes.) 7. Glue all layers together. Start with the white base, add the light blue layer with the black added to the back, next the grey layer and last the white. 8. Add the eyes, nose, teeth and tongue and you are DONE!

This technique for making the base card can work for all kinds of files. Have fun playing with your images! Use them for more then just embellishments for cards; use them AS your cards! People enjoy getting special shaped cards. Give it a try!


Sunday, February 21, 2016

MKC DT Project Cheer Up Get Well Card

Hey Everyone How We're Doin' I'm back today and super excited to share and showcase my 
Project using Miss Kate Cuttables ,But First Don't forget to go grab Your
 FREEBIE 
So Here My Card that I made just to have in my stash for when I know someone 
not feeling so well. I use three files Chick in Umbrella ,Beach Borders for 
The Clouds And So Stinkin Cute for my Sun. For More Details Go To My Channel 
             spyrorocks346 on YouTube 
Now on to my Video Tutorial Click on the link below it will take you to my Projects and
 while you there 
Don't forget to Click on the Subscribe Button for Upcoming videos. Thank You 
 Don't Forget Come Back Often For More Inspiration from Our Amazing DT. 
Smoochez Gloria


      I Just Love How Adorable This Chick came out

 INSIDE 
Thank you so much for stopping bye  
can't wait to see you next Time 


Thursday, February 18, 2016

Disney Days Countdown

Hi Everybody! I'm so excited to share another Miss Kate Cuttables project with you!  First I want to make sure you grab the freebie of the day:


Eeeek, what a cutie!!  Don't miss grabbing him for free today only :)

Now, onto today's project!  I'm SUPER excited that our family will be going to Disney World soon!!  The kids can hardly contain themselves, and can hardly wait to leave.  I thought making a countdown would make the waiting a little funner!  Miss Kate has BUNCH of files that are perfect for any Magic Kingdom trip.  Here are the details for my project:

Miss Kate Files I used:


 To find these files and more, you can look under the Amusement Park/Carnival category, or try a search for "mouse".

*I was excited that I had some Mickey background paper that was perfect for this project!
*To hold the shapes, I covered a clothespin with some Disney themed washi tape.  Then I used my ATG gun to adhere it to the base.

*Since we have girls and a boy, I chose the boy and girl versions of different files.


*We love Disney, so I decided to use the Valentine Numbers set for the countdown numbers.
*I love all these files!!  I had to use that wizard hat when going to the Magic Kingdom :D

I hope you enjoyed my project!  I'd love to see some of you try one of these and share it on the Miss Kate Cuttables Facebook page HERE, or on my Facebook page HERE.  TFL, and hope everyone has a chance to craft today :)


Wednesday, February 17, 2016

Have a Dandy Day!

Hello, everyone!  Thank you for stopping by to see my project for today's Miss Kate Cuttables Design Team Day.  :)

I used the adorable Chick in Umbrella file to make my card -


Isn't he darling?!

Here is my project for today...


I hope you you enjoyed my little card and that you will come back and visit often to see new projects from all the wonderful MKC Design Team! 


Tuesday, February 16, 2016

Ladybugs

Hello my crafty friends!!

It's my day to post with  Miss Kate Cuttables! I am getting ready to head to Florida for an Annual Quilter's Luncheon. I was asked to help decorate a few of the tables so of course I used some of Miss Kate Cuttables' darling SVG files!!

But first, did you know that Miss Kate Cuttables gives away a free file everyday?
YES, absolutely FREE. So what are you waiting for, head over there and get your free file now!!

For my project I used the Ladybug file.
Ladybug SVG file for scrapbooking cardmaking free svg files free svg cuts cute ladybug svg file
The table is going to be super cute decorated with two flower pots as centerpieces. And my adorable ladybugs on sticks will be the center stars!


Each guest also receives a party favor. So I created these adorable tea light candles for each person. The tag is special because, using my Cricut and Miss Kate Cuttables' font Tall & Skinny, I was able to write the theme of the event and the date. Did you know that MKC fonts work perfectly with your Cricut Explore and the pen feature? No outlines here! I love it!!


I can't thank you enough for checking out my project. It means the world to me and I hope you truly enjoyed it. May it inspire you to create something wonderful!   Scrappy Hugs!

Monday, February 15, 2016

Lollipops

Hello and welcome, Debbie here from DD's Crafts  I am so happy to be back here for my posting day at Miss Kate Cuttables.  I love using all the files they have to offer, as they are so fun and easy to work with and best of all, they have a Freebie everyday yes that is right Freebie everyday!!  So when you have finished here be sure to go grab today's freebie

For my card today I made a cute Valentines Day card, yes I know it was yesterday but I wanted to share my card. Here is the file I had used it's called Love Lollipop here is a pic of file.
Love Lollipops Valentine Treats scrapbook cuts SVG cutting files doodle cut files for scrapbooking clip art clipart doodle cut files for cricut free svg cuts
Love Lollipop
 So for my project today, I did a print and cut using my silhouette cameo.  I love using the print and cut feature it makes it so easy and fast.  Let's take a look now at my card I have created to share with all of you.

Love Lollipop
I hope you have enjoyed it here today, for more details on my card head on over to my blog here @ DD's Crafts 

Remember to visit our Facebook page as well, we have a monthly challenge going on each month and this month the theme is "Love" you still have time to enter it goes until the 26th of February.

Now be sure to stop over and grab your today Freebie here @ http://www.misskatecuttables.com/
Thanks for stopping by today. 

Hugs


Thursday, February 11, 2016

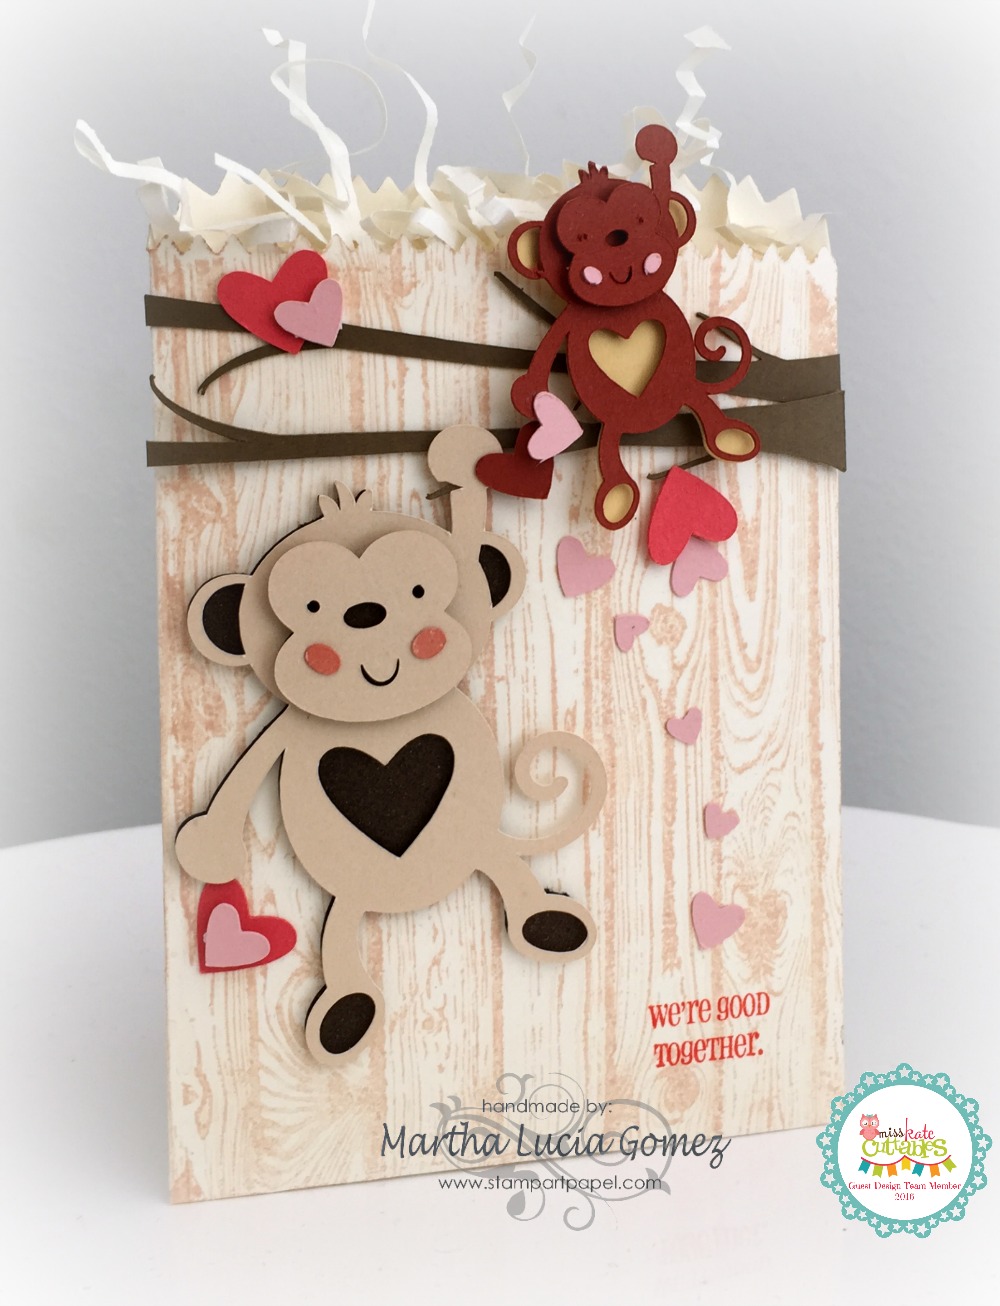
Guest Designer Martha Lucia


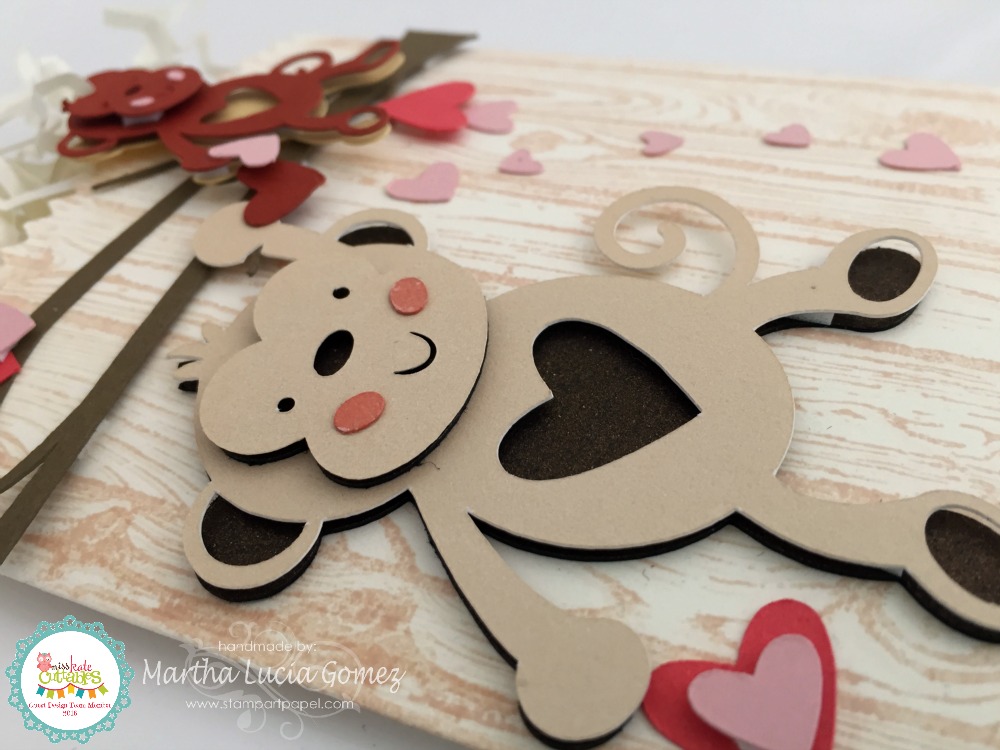
Hello dear friends, it is a pleasure to share with you and honor to be the first Guest Designer of February. Today I prepare a cute project for love, using the Valentine Monkey File. I fell in love with this little monkey as soon as I saw it and I couldn't resist to using it for my project, even more now that we are very close to Valentines Day. MISS KATE CUTTABLES GUEST DESIGNER
To create these monkeys, because I made two, I used my Cricut explore, but one of the advantages of this is that you can find in Miss Kate Cuttables files is that you can use them in almost all electronic cutting machines and also, you can use the files as photos for your creations. Isn't it amazing! I cut the big Monkey using Dark Brown Metallic Card Stock and Ivory Card Stock and the little Monkey, using Cajun Craze and So Saffron card Stock. I duplicated the branch of the tree to give more dimension and I used Soft Suede card stock for this part. For the hearts I used different shades of pink. I pasted all the pieces using dimensionals and liquid glue to create different heights. MISS KATE CUTTABLES GUEST DESIGNER To finalize the project, I cut a Bag using the Mini Treat Bag Thinlits and I stamped it with a hardwood background and a little sentiment. After I assembled the bag, I arranged all the pieces of my Valentine Monkey File over the front of the bag, I pasted them and voila my cute present was finished! MISS KATE CUTTABLES GUEST DESIGNER
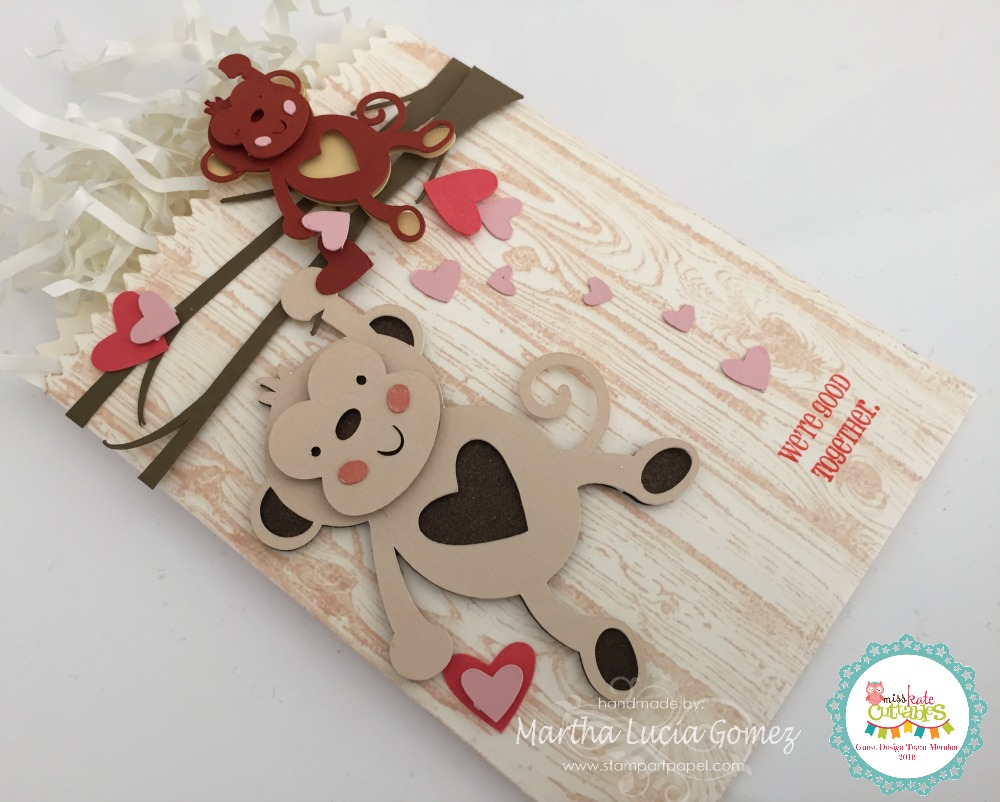
I want to invite you to visit Miss Kate Cuttables Site, they offer a free file every day that we can use in our projects and a very big selection of cutting files for our creations. If you are like me, and love to combine stamping with cutting files or create "hybrid" projects, you have to go; I am sure that you will find what you are looking for! Thank you for stopping by! Martha Lucia