Friday, December 28, 2018

Guest Designers Year in Review


Guest DT Review!!
Another year has come and gone!! Can you believe it?

But, what an awesome year 2018 was here at Miss Kate Cuttables!! 
We had the most amazing guest designers this year and were so lucky to be able to showcase their talents! We wanted to make sure you all were able to see what adorable projects they created using Miss Kate Cuttables files!  
So please join us as we take another look at all of their amazing creations throughout this past year! 

January 12- Janis Lewis


January 26- Nancy Nickel


February 9- Angela Corcoron


February 23- Sue Kracker


March 9- Sonja Bakonyi


April 13- Gerda Bonfrere


April 27- Christi Steinbeck


May 11- Miranda Enclade


May 25- Marji Franklin


June 15- Alicia O'Bryant


June 29- Beckie Williams


July 13- Martha Lucia


July 27- Kim Ferguson


August 10- Shannon Hinders

September 14- Anita Curran

September 28- Kimberly Sisco

October 12- Melissa De Monic


October 26- Sandy Suarez


November 9- Gloria Dasher


November 23- Sladjana Donna Perisic
Miss Kate Cuttables SVG file Oak Leaves colored with Spectrum Noir Sparkle Marker Fall inspired card created with Cricut Explorer.


December 14- Evelyn Holmberg
 

Thank you to all of our wonderful guest design team members, and to all of our super MKC fans for supporting Miss Kate and the designers.
2019 promises to be just as wonderful with a bunch of  new guest designers and fabulous projects!! It kicks off January 11th so be sure to stay tuned!

Signing off for 2018 and wishing you all a very Happy New Year!!
Your Guest DT Coordinator,
 

Saturday, December 22, 2018

Waiting for Santa


Hi there!  It's Kim from Katydid Cards.  This is my last post for Miss Kate Cuttables.  After two and a half years of enjoying being a design team member for Miss Kate, I have decided to step down.  But I will still be sure to continue to get my Freebie of the Day and I encourage you to do the same.
And I'll see you on the Galleria as I will definitely be following to see what the design team and you fans create each month.

For my card today, I used several Miss Kate SVG files; Waiting for Santa and Dog as well as various patterned papers from the Winter Woodland Digital Collection.  As you can see, this cute little pup is waiting for Santa to come to fill his stocking with lots of goodies.


I wanted to turn this into an easel card, so I cut the base to accommodate I thought it would be fun to put a battery operated tealight candle behind the fire, so I cut a piece of vellum to fit.  As the area above the mantle looked a bit sparse, I filled a gold bowl with Poinsettia brads from Eyelet Outlet and added a candle embellishment on the right accented with another EO brad, Holly.

Here's another look from the side.  I didn't take a picture of it, but if you know about easel cards, you know this lies flat for mailing...such a cool idea!


I couldn't get the best picture of it, though I took dozens, here's the card with the tealight behind it.

As this is the end of an era, so to speak.  I took a trip down memory lane, looking at all the cards I've made using Miss Kate's files.  Some are among my favorites.  Here's a link if you want to look, too.

Thursday, December 20, 2018

Jen's Crafty Place with a Winter Spinner Card

HI!! Jenny from Jen's Crafty Place! I have a great interactive card today. It is a spinner card! I used some great files from Miss Kate Cuttables.  Before we get into the project, don't forget to get the FREEBIE of the day!!  Now on to the project!!


I used the "Christmas Penguin" file to cut the penguin two times. I flipped the one penguin horizontal. Then I used the Swirl Snowflakes Digi Paper to make a piece of paper to fit the front of my card. I sized it 1/4 inch smaller then my A2 card. My digi paper finished size is 4 x 5.25 inch.


I designed my card all on my Cameo 3 by Silhouette.  I made my penguins about 2.5 inches tall and made my hole circle larger, about 3 inches in diameter so the penguin can spin freely. I placed them all on my digital mat and cut all the images at once.


I laid a piece of clear thread across the hole and taped it very securely with scotch tape. Then I placed the thread between the two penguins and glued them to each other. Lastly, I added the digital paper on top and my card was finished. For the sentiment I used, " Winter Word Titles". 
 

I didn't like the cut I got with the snowflakes on the sentiment so I had to hand trim them off. I also hand trimmed the white border. I cut the words at a length of 4 inches so the snowflakes were too tiny to have all the details in the snowflakes cut properly. If your cutter is up for the challenge, then leave them on. It is your choice!! I also added some Wink of Stella to the letters for a glistening effect. I used foam adhesive to pop up the sentiment when I was finished.


That is all I have for today! Thanks for joining me and don't forget to sign up for my newsletter!

Monday, December 17, 2018

Reindeer Sign!

Howdy! It's almost Christmas and I got a bit of craftiness in this weekend. Before I share my project just a reminder to grab the Freebie of the Day from the Miss Kate Cuttables Website.

Here's a festive 11x24 sign I created for my design team project: 


I also used the Flying Reindeer Set.

Here's my step by step process:
1. First I stained my board and dry brushed over the stain once it was dry

2. Next I cut the file on my Cameo out of vinyl. I weeded out the letters I wanted to paint, applied transfer tape and transferred it to the board.

3. Next I applied chalk paint.

4. Lastly I removed the vinyl.


Hope you enjoyed my project today! Merry Christmas!!

P.S. Please stop by my blog and take a look :)

Friday, December 14, 2018

Guest Designer Evelyn Holmberg

No automatic alt text available.
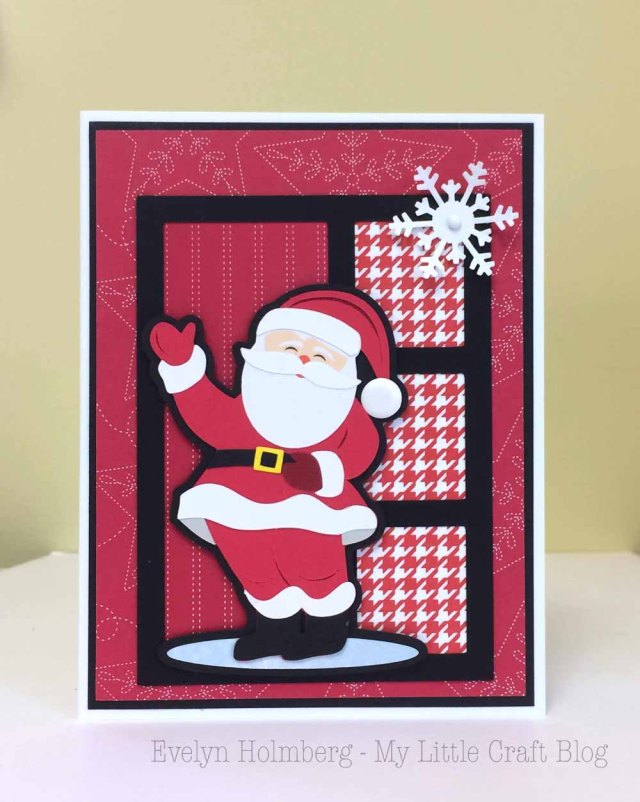
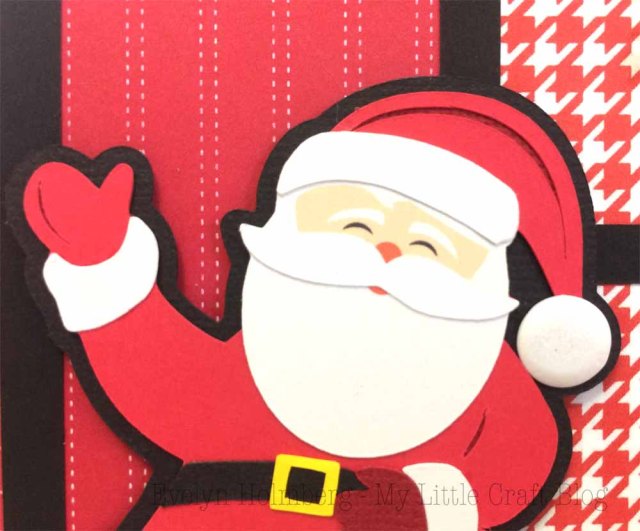
This is my third year guest designing for Miss Kate Cuttables. It's such an honor and so much fun!! It's always hard to decide which adorable file to showcase, but this year I decided to go with Santa. And there are so many to choose from!! I picked Waving Santa for my project, which is a Christmas card. He measures 3.36".
I used the offset tool in Silhouette Design Studio to give him a black shadow so you can see him on the busy background. The paper is from Stampin' Up's Quilted Christmas 6 x 6 designer series. To make Santa, I assembled his face on the virtual mat and did a print and cut. I cut an extra white moustache to layer on top of the print/cut one. The frame he's on is just made with squares and rectangles assembled in the Silhouette software, and the snowflake is a Martha Stewart punch. A "candy" for his pom pom and a white brad in the snowflake center finish off the card! Santa was easy to assemble and is really cute; I think I'll cut him again at 5" to adorn my Christmas scrapbook pages this year!! :)Ho, ho, ho! Merrrrrry Christmas! Evelyn

Saturday, December 8, 2018

I Love You Snow Much!

Hi everyone, it's Sherri from The Squeaky Scrapper and today's my day to showcase on the blog!  

Did you get your freebie for the weekend, you can grab it Here!.  (The freebie posted on Friday's stay all weekend!)
~~~~~~~~~~~~~~~~~~~~~~~~~~~~~~~~~~~~~~~~~~~~~~~~~
Well I have to say digital scrapbooking is coming a little easier and I think I might be able to catch up from years passed when I didn't know what scrapbooking was!  For today's layout I used several files from the store, it's really nice being able to get everything I need from one place.  The first thing I used was the Winter Woodland Paper Collection. This collection is soooo pretty and you get 16 different papers with it.

 Next I used the Girl Christmas Penguin and Christmas Penguin, which are adorable.

Then I used my title I Love You Snow Much Title


Here's how my layout looks completed ~

Thanks for checkin me out! Feel free to stop on over at my blog and say hi :-) The Squeaky Scrapper.

Friday, December 7, 2018

MKC Christmas Tags


Hello Miss Kate Cuttable Fans!
Today is my day to post on the blog today!
First off don't forget the Freebie of the Day
Now on to the Post for today!
With Christmas right around the corner and
your under the crunch to have 
that perfectly wrapped gift and you have 
No TAGS, you can create your own in Snap!
Using the JPG image that the
Miss Kate Cuttables files come with
just print and cut your own! 
I use my Brother CutNScan2 !

Look how adorable these tags turned out!
I use the following cute files.
Snowman Snow Globe SVG scrapbook cut file cute clipart files for silhouette cricut pazzles free svgs free svg cuts cute cut files
Put them on card stock and add
some embellishments and there you 
have one tag made with your 
personal touch!

 Christmas Tree Snow Globe SVG scrapbook cut file cute clipart files for silhouette cricut pazzles free svgs free svg cuts cute cut files
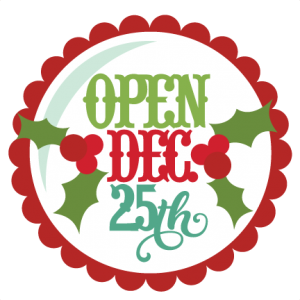
Open Dec 25th Tag SVG cutting file christmas svg cut files cute christmas clipart

By layering other print & cut you an 
get a  3D effect on your tags.
 

Merry Christmas SVG scrapbook titles christmas svg cut files christmas svg files free svgs
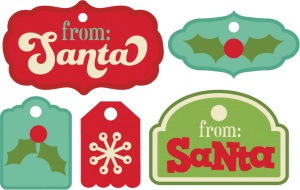
Christmas Tags SVG cutting files

Such a quick and easy fun tags
Just add them to card stock and
add your favorite color twing !  

NOw don't forget to comment and pop
over to my personal blog... 
Follow us both and comment below
Bet you be caught being nice this year.

Merry Christmas!