Sunday, September 30, 2018

September Fan Projects

Hello There! It's Amy from the Design Team and I'm sharing the Miss Kate Cuttables Fan Projects from September.

You can share all your Fan Projects on the Miss Kate Cuttables Galleria Facebook Page!

Here are the wonderful creations!

Card by Julieta Martinez Flores‎ 

Truck by Loretta Potz

Halloween Cards by Kim Harris

Summer Digital Layouts by Kim Harris


Thanks to everyone who shared their projects this month!


Friday, September 28, 2018

Guest Designer Kimberly Sisco


Hello Friends! Today I am excited to share my project that I have created as a Guest Designer for Miss Kate Cuttables. I absolutely love Fall and was wanting to create a fun and quick home decor project. I found the perfect Fall inspired files at Miss Kate Cuttables.


Saturday, September 22, 2018

Boo To You !

Hi everyone ! I am back once again with my monthly post for Miss Kate Cuttables. This time I want to share a cool card I made using a tutorial on You tube. It is called a "Twist and Pop Up card". I thought it would be perfect to showcase some of the cute papers that are available from Miss Kate Cuttables and the sweet Witch SVG that matches!
Before I forget...Have you gone to get your freebie from MKC? One is given away every day Monday through Friday with the Friday one being up to grab all weekend.
So... here are a few pictures of my twist and pop up card...
Oh and while I was at it I used some of that cute paper to make a candy "pillow pocket" too !

I love how the paper in the pack matches the witch SVG image that is also available from the store. It sure makes it fun to create!

The stamps are that were used to put the sentiments inside are from House Mouse and my "BOO" was done with my Cricut Explore and Design Space.

Here are a couple more pictures

Have a great week everyone and have fun creating with Miss Kate Cuttables!

Hugs,


Flying Witch

Hello all.  It's Kim from Katydid Cards here with you today.

I love Halloween cards, so I decided to make a few to send to special friends this year; like this flying witch.  I couldn't think of a better place to shop for cut and print files for those cards than Miss Kate Cuttables as there are just so many choices available.

Did you know that Miss Kate offers a Freebie every day?  Don't forget to pick up yours and while you're there, why not check out the Deal of the Day!  If you're not into checking in every day for a freebie, you can also get the entire month's collection of freebies at a deeply discounted price.


I started with the Flying Witch (which includes the crescent moon) and created a pull slider for her so she could fly across the ghost-filled night sky which comes from the Halloween Night Digital Paper Collection.   I changed the background color from black to purple, which is the beauty of digital paper!   After I created my slider and got everything situated as desired, I spritzed everything liberally with Shimmer Spritz.  I also coated the moon with Clear Nuvo Drops. 

The card seemed a bit lacking, but I didn't want to add anything which would keep my little witch from flying so I opted to place several Enamel Stars from Eyelet Outlet.

Here's what happens when you tug on the pull tab:


For inside the card, I made a simple panel with corresponding colors and a sentiment.


I hope you have the opportunity to make some fun Halloween cards and scrapbook pages yourself!


Thursday, September 20, 2018

Halloween Decor with Miss Kate Cuttables and Jen's Crafty Place

Hi!! Jenny from Jen's Crafty Place here. It is that time again to start thinking about Halloween Decor!! I have a great and VERY EASY project today to jump start your Halloween decorating.

But first, hop on over to Miss Kate Cuttables to get today's FREEBIE!!


I first got my file from Miss Kate Cuttables.  I chose the "Witch In Moon"  file but just about any file will work with this method. I put my image on the Silhouette Cameo 3 program mat and sized it as large as it would go to fit my 12x12 inch mat.


 I cut out my image and weeded the image and set it aside. Then I proceeded to cut 3 more layers the exact same way. I used regular black 12x12 inch cardstock. Since I wanted my decor to be more sturdy I needed more layers. (If you had some mat board, you could sandwich that between two sheets of paper and that would be nice and sturdy. Just run a black marker around the edges to hide the mat board edge.)


I added glue to my last image and layered them together. If you have more then one mat, I would layer as I went. It is easier to glue while it is still on the mat because you can toss any paper that the glue seeps out on. This is also easier to line up the image.


Before I added my last layer, I added a piece of fishing line to the top as a hanger. I chose to run the line down her head and hat and up to the second ring around the moon for more stability. 


At this point, you could be done, but I decided to add a bit more bling to my piece.


I just put some glue down and then sprinkled on some black glitter. Let them dry and this decor is finished!!  Time to make some more!!


I only placed it in front of the door to photo, hang it anywhere you want a bit of Halloween!

Thanks for joining me today. Please stop by my blog for more inspiration and sign up for my newsletter so you don't miss any upcoming projects!

Wednesday, September 19, 2018

Jungle Animals Center Piece

Hello Everyone,

This is Rebecca from Rebecca Ann Designs

Did you know that Miss Kate Cuttables gives away a FREE file everyday?

Click here to get your FREE file

I used some of the ZooAnimals that Miss Kate Cuttables has HERE

Here is my project for t his month:


I used the Miss Kate Animals to make these cute little centerpieces to match the name project I made last month for a baby shower for my cousin,  They were a big hit and everyone was asking how I made them. 

Thanks for checking out my project.


Friday, September 14, 2018

Guest Designer- Anita Curran


Hi everyone! I hope you are all having a great Friday.
Today I am THRILLED to be a Guest Designer for Miss Kate Cuttables. 

I love Miss Kate's designs and this one has been one of my favorites!

I needed to make myself a cute Fall mug 
(although post-project, I am wishing I did this little guy in purple)

 For my project, I used Fall Raccoon 080918 and it can be found here
I loved how cute it is against my orange mug and I can't wait to drink my next Pumpkin Spice Latte in it!

Thanks for stopping by today and enjoy your weekend.

Saturday, September 8, 2018

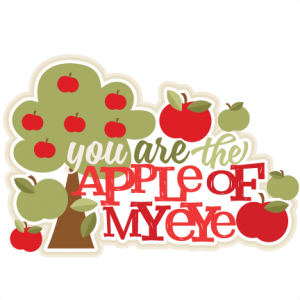
You are the apple of my eye

Hi everyone, it's Sherri from The Squeaky Scrapper with today's inspiration post.

Did you get your freebie?  If not, you can grab it Here!.  (The freebie posted on Friday's stay all weekend!)
~~~~~~~~~~~~~~~~~~~~~~~~~~~~~~~~~~~~~~~~~~~~~~~~~
Today's inspiration is a little card I made for a friend.  I used the file from the store called You are the apple of my eye, which looks like this ~


Since I was mailing this card I did it as a print & cut and then pop dotted a couple of the apples.  This way it's not as heavy for your postage, and it's still super cute!


Thanks for stopping by today.  I'd love it if you'd stop on over to my blog at The Squeaky Scrapper and say hello. 

Friday, September 7, 2018

Apple of my Eye Card!

Hello! MKC fans today I have a wonderful
and unique folded card to share with you today!

It's is done with  my  Brother Scan & Cut  
Which if you haven't  
But first don't forget to swing by
the Miss Kate Cuttables and graby
your FREEBIE of the day! 

Today print and cut use is the super


Card is a double fold card with paper panels
for added flair just use some pop ups to 
attached the two apples cuts 
White Highlighter pen used for  added effect.

Inside I use the saying 
You are the Apple of my Eye! 
Really ties it all together...
Get your file 
Now make sure  you comment below 
 follow the blog and the design team for 
some really cute things
to come.. Watch all of MKC videos too
you can find her at {HERE}
thank you for stopping by!