Hi there! It's Kim from Katydid Cards with you today!
I'm getting a jump on making holiday cards thanks to Miss Kate. Speaking of which, don't forget to pick up your Freebie of the Day at the store. Lots of great Autumn cut files and printables are coming out every day.
For my card today, I used the Fall Words cut file and the Autumn Digital Collection.
I made a simple card base, sized to fit in a business envelope. Using an internal offset in my Silhouette, I created two mats. The larger is cut from Copper Foil Paper from Stampin' Up. In addition to the mat, I cut the word grateful. The smaller is a print and cut from which grateful is cut.
I attached both to the card base and inserted the copper piece in the opening. I was careful to save the interior pieces from the g, a, e, f, and l so I could place them back in the word.
Before I attached the patterned panel, I wrapped it with Copper Thread from Stampin' Up. As a final touch, I added wooden embellishments also from Stampin' Up (now retired) which I colored with a Copper Leaf Pen.
I opted to leave the inside of the card blank for now as I'm undecided about whether I want to use this as a Thanksgiving or a thank you card. I'm grateful for both...and I'm grateful you came for a visit!
Saturday, August 25, 2018
Thursday, August 23, 2018
Popsicle Fun with Jenny from Jen's Crafty Place
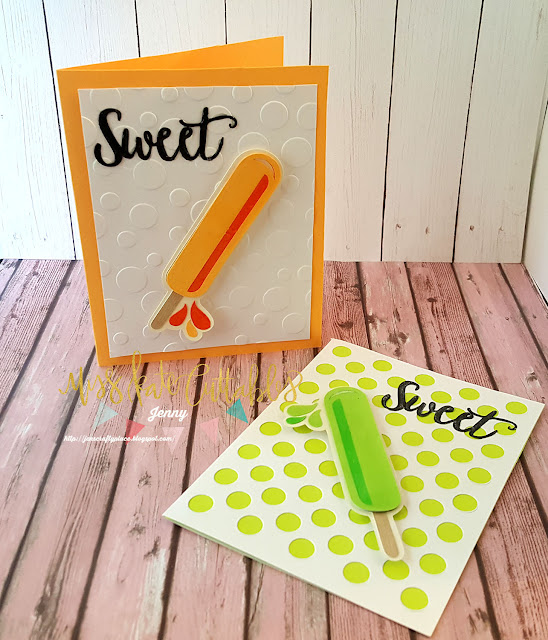
Hi!! Jenny from Jen's Crafty Place here with today's post. I decided to make a fun summer card set. I love these popsicles from Miss Kate Cuttables! Stay tuned to see how I made these cuties!!
Before we get into the project, don't forget to head over to Miss Kate Cuttables for the DAILY FREEBIE! On to the project!!
You can find the designs I used HERE. The file is called "Popsicle Set" but if you don't find one you like in this set you can find more popsicles HERE.
I cut out all my popsicles and glued the layers together and then added a layer of crystal effects over the popsicle parts. I set these aside to dry.
I made some simple backgrounds for these cards since I wanted the main focus on the popsicles. The green card is using a simple dot die cut which I cut out of white and layered over some light green cardstock and mounted on an A2 card base.
For the orange popsicle background I used a dotted embossing folder with white paper and mounted it on an orange A2 card base.
I wanted a simple sentiment that would not take away from my popsicle image. I chose a simple "SWEET" word from "Valentine Word Set". After I cut the word out of black I glued it on the card front. For the green card, I added some glitter pen for some shine.
For the orange one I added some crystal effects over the word "Sweet" to do something different. After I added the dried popsicles to my cards I was finished with these two "sweet" cards! I can use them for a: Thinking of you, Birthday, Summer hello, Graduation card, or a Thank you card. This is a great card to add to your stash for when you need a card in a hurry.
Enjoy!
Wednesday, August 22, 2018
Jungle Theme Name
Hello
Everyone This is Rebecca from Rebecca Ann Designs
Did
you know that Miss Kate Cuttables gives away a FREE file everyday?
Click
here to get your FREE
file
I
used some of the ZooAnimals that Miss Kate Cuttables has HERE
I
made this cute name for my cousins baby shower (she hasn't seen it yet) but I
was so excited to share it
It
was so fun using the zoo animals for this project and can't wait to make so
more decor with them .
I
used animal theme papers from Hobby Lobby and the Chipboard letters also from
Hobby Lobby.
This
was a fun project 😊
Thanks
for stopping by
Rebecca
Monday, August 20, 2018
Back to School Layout
Before we jump into my project check out this amazzzzing Freebie of the day!
Check out the 1 minute make and subscribe to Miss Kate Cuttables YouTube Channel.
My boys are starting back to school today and I have a layout to share!
(These are pics from 2017.) I'm pretty caught up on scrapping but not that caught up :)
Check out the 1 minute make and subscribe to Miss Kate Cuttables YouTube Channel.

My boys are starting back to school today and I have a layout to share!
(These are pics from 2017.) I'm pretty caught up on scrapping but not that caught up :)
I used the Miss Kate Cuttables Apple on Books SVG. I only used two of the books for my layout. I added their names and grades to the books with the pen tool on my Cameo.
I used the Miss Kate Cuttables Paper for my project! The papers are AMAZING!
It is called School Days - Paper Pack.

I used a Close to my Heart Flip Flap to add the Back to School Chalkboard.
I also added some photos to back of panel.
Thanks for stopping by today!
If you have kiddos going back to school make sure to get those photos out to scrap their special day!
Stop by my blog to check out more of my projects.
Stop by my blog to check out more of my projects.
Saturday, August 11, 2018
Orange you sweet!
Hi everyone, it's Sherri from the Squeaky Scrapper with today's inspiration post.
Don't forget your freebie from yesterday, you can get it Here! (the freebie posted on Friday stays all weekend)
Don't forget your freebie from yesterday, you can get it Here! (the freebie posted on Friday stays all weekend)
~~~~~~~~~~~~~~~~~~~~~~~~~~~~~~~~~~~~~~~~~~~~~~~~~
Today I made a little card using this cute little orange from the store ~
Thanks for stopping by today. I'd love it if you'd stop on over to my blog at The Squeaky Scrapper and say hello.
Here's how it come out ~
Thanks for stopping by today. I'd love it if you'd stop on over to my blog at The Squeaky Scrapper and say hello.
Friday, August 10, 2018
Guest Designer- Shannon Hinders
Hello Miss Kate Cuttables fans.
I'm Shannon and I'm the guest designer for today August 9th. I sharing a two layouts with you I hope you enjoy
The first of the layouts is from my week with my husband when we were camping at the State Park in Branson Missouri. I used Camping fun file and you can find it here https://www.misskatecuttables.com/products/camping-outdoors/camping-fun-title.php. The fire and Marshmallows and you can find it here https://www.misskatecuttables.com/products/camping-outdoors/roasting-marshmallows.php .The last is the frame for my pictures and my journal page. I used Wood Frames there is a square that goes behind the frame but with no pictures I didn't want to take the chance of me gluing them down now. You can find the frames here https://www.misskatecuttables.com/products/camping-outdoors/wood-frame-with-tree.php I used a mixer of cardstock from my piles.
For my second layout was also from the same trip. This layout is going to be for our hiking day I used the wood Frames again and again you can find it here https://www.misskatecuttables.com/products/camping-outdoors/wood-frame-with-tree.php. I took some brown paper and riped it to make it look like the dirt on the trails . I hoped you enjoyed my layout and thank for looking.
Friday, August 3, 2018
Free HUGS!
Hello Everyone and welcome to Miss Kate Blog
Today is my day to post and I am
so excited about the this cute card.
Using my Brother Scan and Cut you can
take the .JPG files
and cut out any file from MKC. I always
have make sure I use the boarder mode too
to get a good clean print and cut look.

Like this little sea horse I used and
just flipped the image
cut out two and pop them up DOTS!
Easy as Pie!
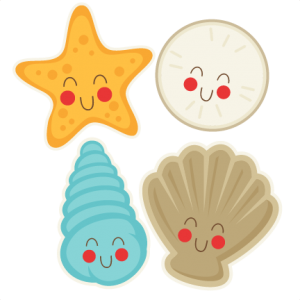
used these adorable Cute Seashells too!
Just like adding a splash of cuteness.

Now MKC is know for adorable SUN so
just had to use this one with smiling face.
Snap on a cute sentiment FREE HUGS!
and you got one adorable card ...
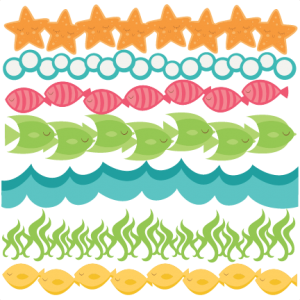
Oh and don't forget to add a cut wave boarder too!
They can tie in the whole look of your card.
I used Underwater boarders
Thank you for stopping by and checking
us out if you not a follower of MKC blog
please do so we love our followers
We also have a MKC group on FB
Called Miss Kate Cuttables Galleria
Come join in the fun there too!
Thanks for stopping by and
you can see this and other post on
my personal blog
Subscribe to:
Comments (Atom)


